| Spiral Abyss Guides | |
|---|---|
| What is Spiral Abyss? | Guide & Tips |

This page is dedicated to guides on how to handle the Spiral Abyss. If you don't know what it is, or how to get there, then click the link below.
Even though trying the Abyss uses no resource whatsoever, it won't hurt to be more prepared before going into so that you don't get massacred. It's recommended that you fully understand the mechanics of the game in general. Check out how elements works and their reaction, and artifacts to prepare your team for the Abyss.
It's important to have a balanced team that synergizes well together. Try to focus on at least 1 main damage dealer per team, since you need 2 parties at floor 5 and onwards.
Every team needs to be able to deal consistent damage, and it's important that you know who your main damage dealer is. Examples of main damage dealers:


Diluc and Razor are good examples of main damage dealers since they are made to deal damage, and have high multipliers on their skills. Using different elemental party members for effects like Super Conductor, or Vaporize will increase your overall damage.
What's considered a support? Supports are team players in your party that are helpful for dealing damage, or just utility focused. If your main damage dealer is Pyro element, you can bring characters like Barbara that doubles as a healer and elemental reaction support. Characters like Beidou or Noelle helps with blocking attacks, or Venti for the ultimate enemy grouping ability. To put it simply, bring characters of different elements to take advantage of elemental reactions depending on what element your main damage dealer is. Support examples:


Characters will also get bonus energy gain when you get elemental orbs of the same element as your character. Using Pyro elemental skill will give fire energy orbs, making your Pyro characters reach their elemental burst much faster. You might consider bringing another character of the same element to help energy gain for your main damage dealer.
While you definitely don't "need" healers, especially if you are good at dodging and not getting hit, it's still often recommended to bring healers. Though, most of the healers are restricted to characters in the gacha. The only one that is easily obtainable is Noelle, since you are guaranteed to get 1 from the beginner's wish. Otherwise, any healer works.


Alternatively, you can use weapons like Prototype Malice for some team heals.
Diluc is the main damage dealer in the party. Chongyun provides Cryo element for Diluc to use so his Pyro attacks will get doubled due to melt reaction. Xiangling is Pyro support for elemental resonance, increasing everyone's attack because there's 2 Pyro in the party. Barbara is the healer with Hydro element, useful for vaporize reaction.


This is still a good choice for a party setup if you are not lucky with the summons. Xiangling can be the main damage dealer as long as you have good artifacts that increases ATK or phys dmg. Lisa and Kaeya are for Super Conduct or Overload reactions. Noelle for defensive skills and some healing.
While you may not be able to eat some food before going to the abyss to get some quick and easy stat boost, you can still stack quite a number of buffs on your character to get an advantage.
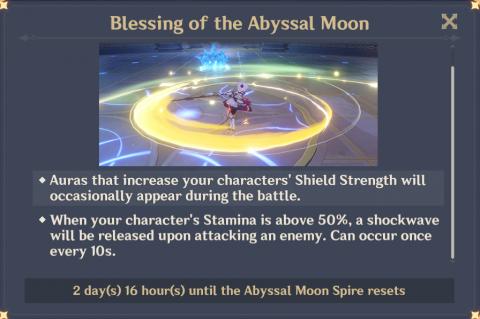
In the Abyss, you will occasionally see an aura in a circle, you might not know their effects if you don't read the notice, or forget them during battle, but these are quite useful effects, and they change when the Abyssal Moon Spire resets as well.
The important part is the one that requires certain conditions like the second effect shown above. If you don't manage your stamina, then you will end up dealing less damage.
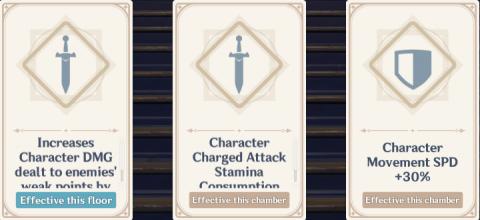
Similar to the blessing, try to keep track of certain effects under certain conditions. If you take passive effects then it can make things easier, but there are ones like increasing damage within a few seconds after you do a dash. These kinds of effects have cooldowns on them, so it's best not to waste them and used properly.
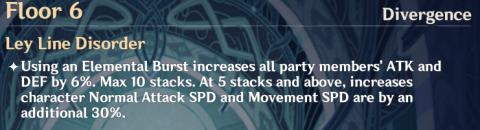
Ideally, you're going to want to build your team, gear, or playstyle for these effects, and floor 6 is a good example of this. Your setup can be for energy recharge, or same element teams for energy gain increase, then use your elemental burst often. At 10 stacks, that's a total of 60% ATK and DEF, on top of the atk speed increase as well. If you don't utilize this then you are missing out on a lot of damage.

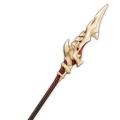
Weapons that are 3 stars or above have effects that may require certain conditions. Using the picture above as an example, you can increase your atk by 48% for 10 seconds every 20 seconds simply by switching to the character, then onto another character. Crescent Pike is also another good example, if you don't use elemental skills, then you won't get the bonus effect that increases your damage.
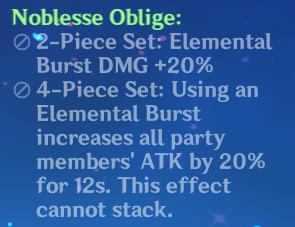
Lastly, if you happen to be using artifact sets with conditional buffs, then you're going to want to keep track of it too. Noblesse Oblige has a powerful set effect that increases your entire party's attack by 20% for 10 seconds just by using an elemental burst. Viridescent Venerer is also quite strong that should be used often.
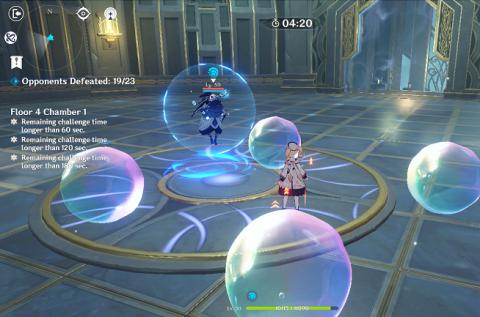
Some enemies will have an "aura" on them. Enemies with an aura are not exclusive to the abyss, but you can encounter them somewhat early starting in floor 4. Different elemental auras will do different things, and all of them are definitely not good for you. All of the aura effects spawns every few minutes/seconds, and targets your location.
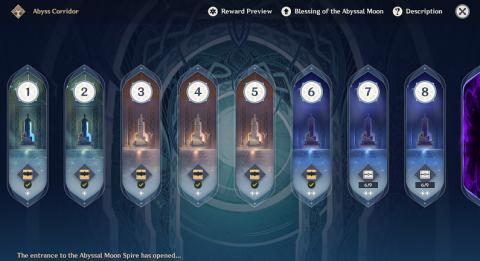
In order to unlock the next floor, you need to complete the previous floor with a total of at least 6 stars, out of a possible 9. This can be a daunting task if you try to do both at the same time, but the easy solution is to focus on them separately, and the way you do this is by making parties focused on each chamber.
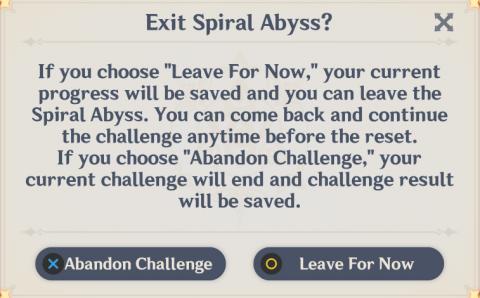
If you enter a floor and get 3 stars on the first chamber, you can exit/abandon the progress but the amount of stars that you get will still be "saved". If you enter the floor again and only get 1 stars on the first chamber, you will still have 3 stars on record since it only keeps your highest. Doing it this way, you can make specific parties that are good for handling each chamber to try and get 3 stars.
The recommended way to do it is to make a party for the third chamber of a floor. Focus on just being able to clear the entire floor without worrying about the speed of each chamber. You can stall and regen your energy on the second chamber, so that when you reach the third, you will have your elemental bursts ready to try and take down all enemies fast. Doing it this way, you will know how many stars you end up with on the third chamber, and know how many stars you need to get for the first and second.
Floor 1 through 4 are relatively easy since you only need to focus on 1 good party. You'll want to be at around level 40~50 since the enemies are at level 50 in floor 4. Make sure to take advantage of the Ley Line Disorders to increase your damage.
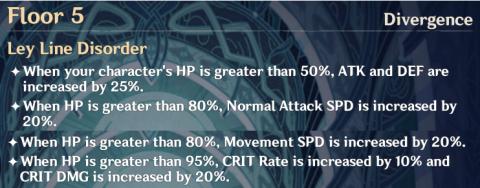
This is when you start needing 2 parties to enter. Floor 5 is not that demanding on both parties just yet, since you can still focus mostly on your first team, then put 1 damage dealer on your second team.
Similar to Floor 5, bring Pyro element for your first party, then have some Hydro characters for second party.
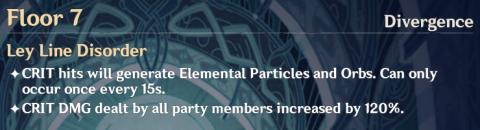
Floor 7 is arguably the most difficult floor out of 1~8 because the enemies are quite difficult and they have elemental shields, so you have to understand elemental how they work. The most effective way of reducing their shield is by attacking with an element that the shield is weak against. It does not matter if you attack with a low level character, as long as the element is right.
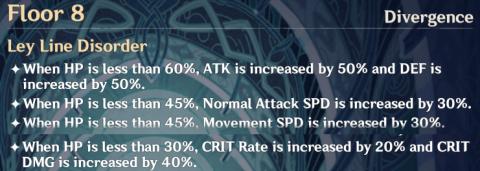
Floor 8 is an easier time compared to 7 since they are mostly smaller enemies. Take advantage of the Ley Line Disorder by lowering your HP to below 60% for some ATK and DEF boost.

| Event | Duration |
|---|---|
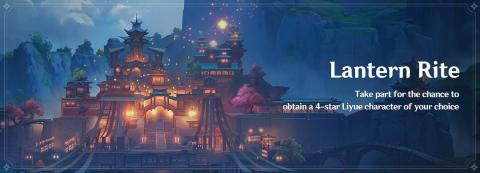 Lantern Rite Event | Feb 10 ~ |
| Theater Mechanicus | Feb 10 ~ |
| Vishaps and Where to Find Them Event | ? |
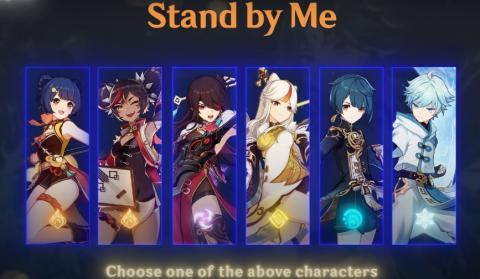 Stand by Me Event | Feb 10 ~ |
 Keqing & Dance of Lanterns Event Wish | Feb 17 ~ |


![]()
![]()
![]()
![]()
![]()
![]()
![]()
![]()
![]()
![]()
![]()
![]()
![]()
![]()
![]()
![]()

| How to Beat Guide | ||
|---|---|---|
 Oceanid |  Dvalin |  Monsters |
 Hypostasises |  Tartaglia | |